
Windows Defender is one of many pre-installed apps on Windows PC. It is a basic antivirus software with basic features. If you are going to install third-party antivirus software, you have to turn off or disable the built-in antivirus application. Here, we discussed the same, how to turn off the application temporarily and permanently.
Before getting into the steps, make sure that you are using the latest version of Windows OS on your PC. If not, update it to the latest version. The steps may vary based on the version of Windows OS.
How to Turn off Windows Defender?
Turning off Windows Defender is different on each version of Windows. Here are the ways to turn off Windows Defender 10, 8, and 7.
Windows 10
(1) Tap the Windows key button on the keyboard or from the desktop.
(2) Go to the Settings option and click it to open.
(3) From the Settings menu, choose the Update & Security option.
(4) On the next screen, click the Windows Security option.
(5) Now, click the Virus & threat protection button.

(6) Open the Manage Settings tab.
(7) Turn off the Real-time protection toggle.

If you have a scheduled scan coming up, it will scan all the downloaded and installed files.
Windows 8
(1) Open the antivirus application on your PC.
(2) Tap the Settings tab on the app.

(3) Untick the Turn on real-time protection checkbox.
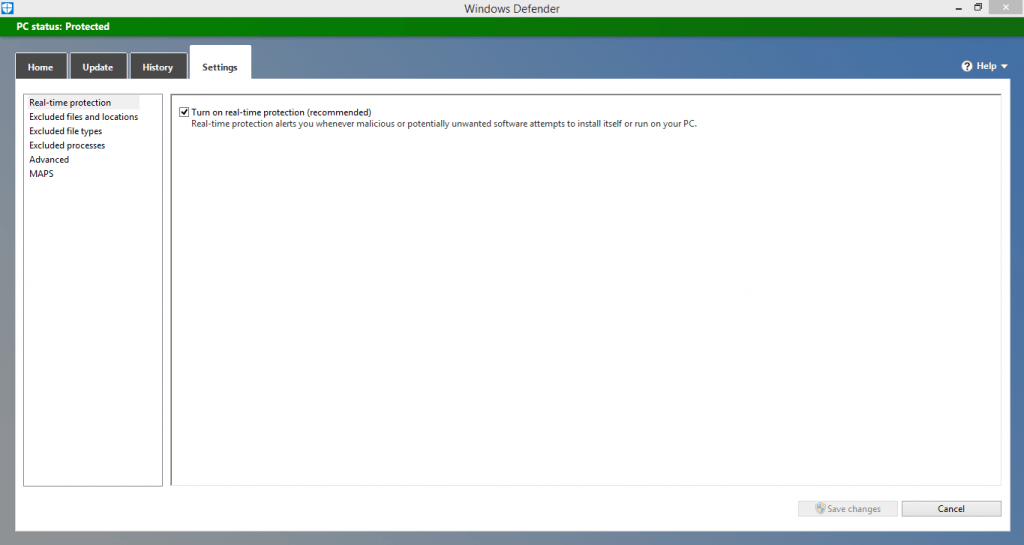
(4) Then, click the Save Changes button to confirm the changes.
Windows 7
(1) Open the application on your Windows 7 PC.
(2) Instead of the Settings tab, click the Tools tab.

(3) Now, the Tools and Settings window will appear. Click the Options button.

(4) Then, click the Administrator tab on the right pane and untick the Use this program checkbox.
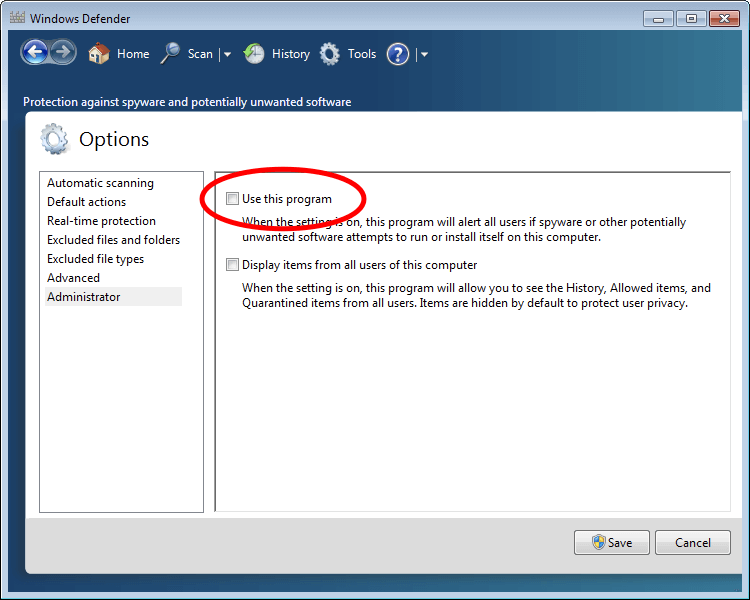
(5) Click the Save button to confirm the changes.
Related: How to Update WiFi Driver on Windows 10?
Turn off Windows Defender Using Registry Editor
(1) Open the Run program and search for regedit.
(2) This will open the Registry Editor window. Click the HKEY_LOCAL_MACHINE folder.

(3) Follow the command Software –> Policies –> Microsoft –> Windows –> Windows Defender.
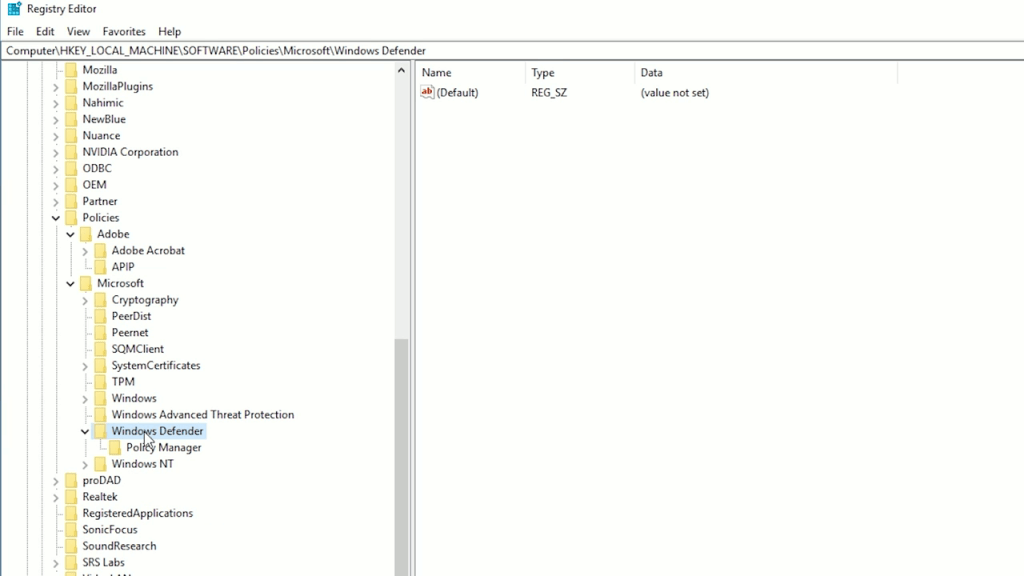
(4) Right-click the Windows Defender folder and go to New –> DWORD (32-bit) Value.

(5) On the right pane, rename the file as DisbleAntiSpyware (without any spaces).

(6) Double-click the renamed file and change the value from 0 to 1.
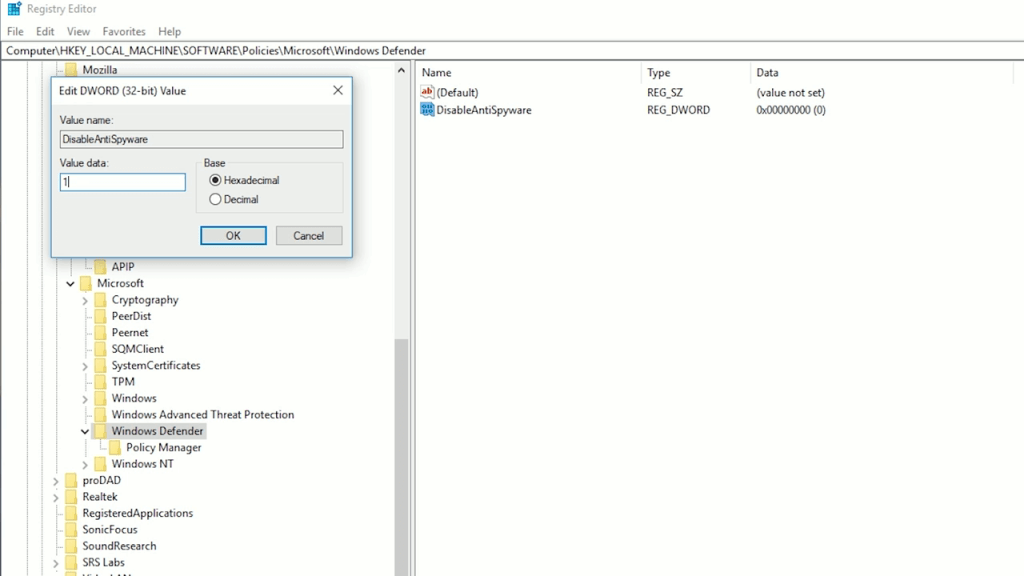
(7) Then, click the OK button.
Turn off Windows Defender using Local Group Policy
(1) On the Run window, search for gpedit.msc
(2) The Local Group Policy Editor window will open. Follow the command Computer Configuration –> Administrative Templates –> Windows Components –> Windows Defender.
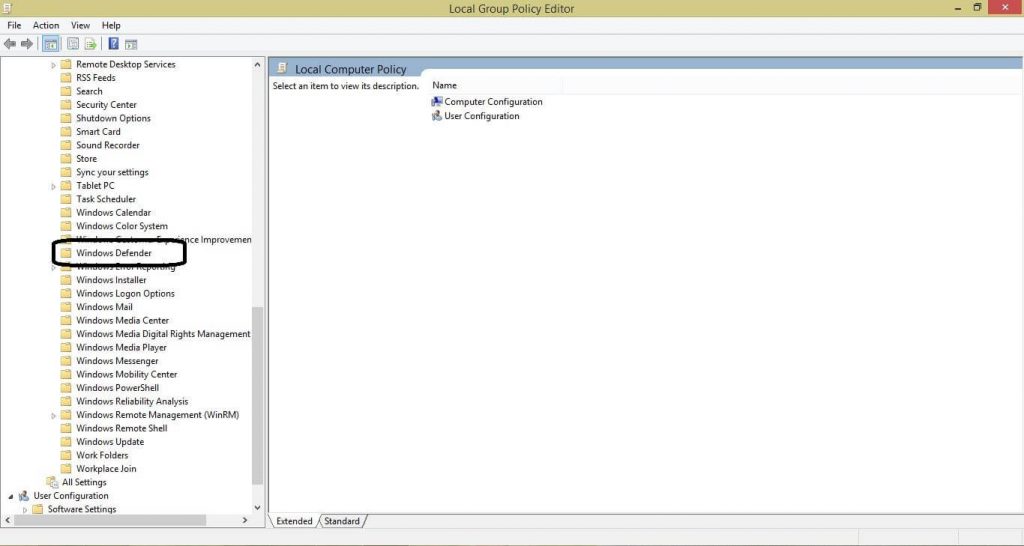
(3) Now, on the right, select the Turn off Windows Defender option.
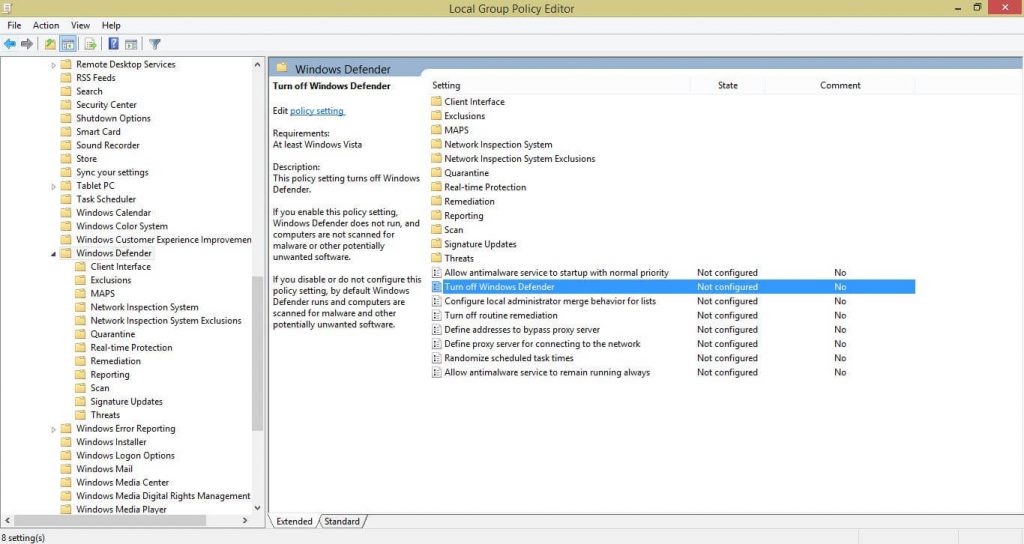
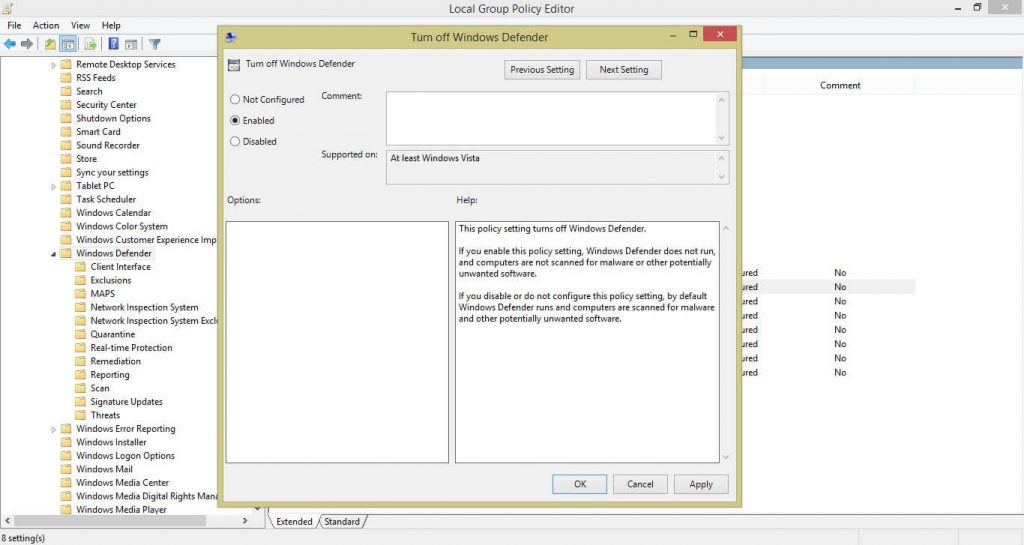
(4) On the dialog box, click the Enable button and OK button to confirm the changes.
The last two methods will permanently disable the antivirus application. Restart your PC to save all the changes.
These are the different ways and methods to turn off the pre-installed Defender application on your PC. Use the steps that are appropriate for you and disable the built-in antivirus software. If you have any difficulties, drop us a comment below.