
Nvidia Drivers is the software for Windows PC to control graphics cards and Graphics Processing Units (GPUs). It offers features and application support for games and creative apps. When you install drivers in your PC, it means you are giving instructions to all parts of the PC like what is GPU and what can it do, and how can we use it efficiently. But if you want to install the latest or new Nvidia Drivers, you have to uninstall the old one. You must be careful while deleting the Nvidia Drivers on your PC, and you should uninstall all its associated files. Go through this article to learn the procedure to uninstall Nvidia Drivers on your Windows PC.
Way 1: Uninstall Nvidia Drivers on Windows using Control Panel
1) Launch the Control Panel on the Windows laptop or computer.
2) Select the Uninstall a Program option.
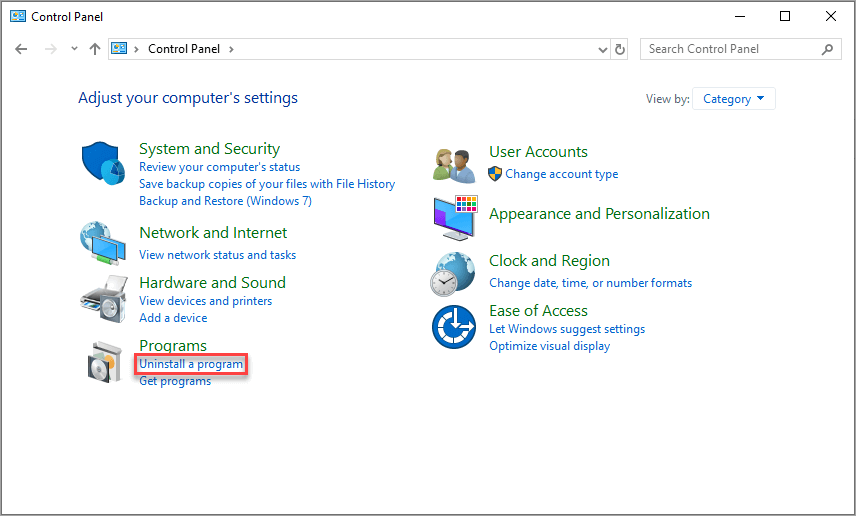
3) In that, right-click on Nvidia Driver and then select Uninstall.

4) Now, restart your PC, and this will remove Nvidia Drivers on your Windows 10, 8, and 7 PC.
Note: You can also press Windows key + X >> Settings >> Apps >> double click on Nvidia Graphics Drivers >> Uninstall.
Way 2: How to Uninstall Nvidia Drivers on Windows 10 using Device Manager
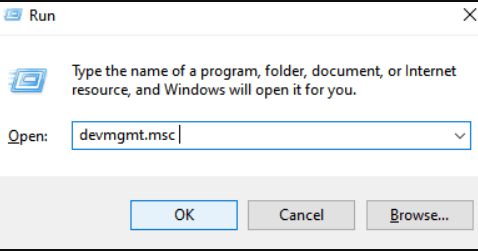
1) On your Windows device, press Windows key + R to open the run command.
2) In that, type devmgmt.msc and press OK.
3) On the device manager dialog box, select the View tab.
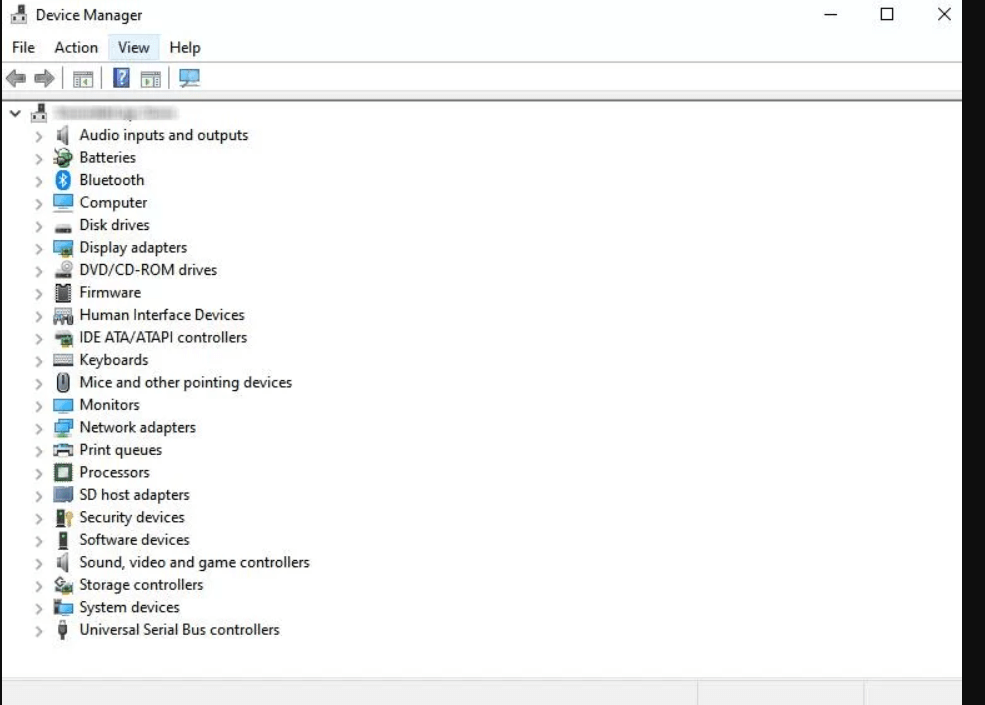
4) From the drop-down, select Show hidden devices.

5) In that, right-click on Nvidia Graphic drives and select the Uninstall option.

6) Next, on the confirmation prompt, select the Delete the driver software checkbox and press OK.

7) Now, the Nvidia Driver will be deleted on your computer.
Way 3: How to delete Nvidia Drivers Folders on Windows PC
Note: This method consumes time and effort, and you are going to delete only the Nvidia Driver folders on Windows 10, 8, and 7.
1) First, launch File Explorer on your Windows PC.
2) Select the View tab and check in the Hidden items box.
3) Click on This PC from the left pane and select Local Disk C.
4) Then, select the NVIDIA folder and press the Delete key on the keyboard.
5) Now, open the ProgramData folder, which is grayed out.
6) Search for any folder named Nvidia or Nvidia Corporation. If you find any, select them and press the Delete key.
7) Click on the back arrow to go back to C drive and select the Program Files folder to open it.
8) Click and select the Nvidia or Nvidia Corporation folder and delete it.
9) Then, open Program Files (x86) and delete any Nvidia files or folders.
10) Go to the Users folder to click on your Username folder.
11) Select the AppData folder to open the local folder.
12) Check for any Nvidia folders and delete them.
13) Finally, go back to the AppData folder and launch the Roaming folder to delete Nvidia folders.
Way 4: Uninstall Nvidia Drivers on Windows using Third-Party Software
Other than the above-listed methods, you can also use third-party software to uninstall the Nvidia Drivers. These software can also be used to update drivers on Windows PC. The best third party software to uninstall Nvidia Drivers are,
- Driver Easy
- Driver Booster
- DDU or Display Driver Uninstaller
Related: How to Disable NVIDIA Overlay Settings [3 Methods]
Wrapping Up
These are the different methods to uninstall Nvidia Drivers on a Windows laptop or desktop. You can select the best method to delete the Nvidia Drivers, and using Control Panel can be the easiest way. We hope this article meets your needs. If you have any suggestions, let us know in the comments section.